Two Sides of A Coin

My husband and I wanted a place to share our projects...I do crafting (e.g. cards, sewing, etc...), household projects, and parties for kids. My husband makes toy trucks, household projects (e.g. closet redesign), and helps with party decorations and games. While he's a professional contractor, we do this for fun. We both cook, but I am more likely to try new and different recipes. We'll be trying out Pinterest items and reporting back.

Monday, December 24, 2012

Cinnamon Adult Apple Cider Ice Cream

My father-in-law is a huge ice cream fan - has to have a bowl every night.  So, I thought we would try something a little bit different, a little healthier.

So, from Pinterest, I found this recipe for Apple Cider Ice Cream.  Using my handy Kitchen Aid mixer with ice cream maker attachment, it was actually pretty simple and without a lot of "fancy" ingredients.  I, of course, tweaked the directions (see below for my version).

Cool and refreshing - Very apple-y (is that a word?).  I would suggest making it in the fall, as that seems the season for apple dishes.


Cinnamon Adult Apple Cider Sorbet

Makes 1 1/2 quarts

Ingredients

1 1/2 cups fresh apple cider
2/3 cups sugar
1 teaspoon whole cloves
5 whole cinnamon sticks
1 1/2 cups unsweetened applesauce
3/4 cups cranberry juice cocktail (make sure it's 100% juice)
Juice of 1 lemon
2 tablespoons dark rum or other alcohol

Directions

  1. Stir together apple cider, sugar, cloves and cinnamon sticks in saucepan. 
  2. Bring to a boil over medium heat , stirring occasionally. 
  3. Simmer for about 15 minutes. 
  4. Remove from heat. 
  5. Remove cloves and cinnamon sticks with a slotted spoon; discard.
  6. Give it 10 minutes to cool.
  7. Add the above mentioned mixed ingredients to your ice cream maker attachment.
  8. Add in applesauce, cranberry and lemon juices and rum. 
  9. Let it run for 15 to 20 minutes - you'll be able to see if start to form up like ice cream.
  10. Enjoy! 
You can cover and refrigerate overnight. Freeze as directed in the instructions for your particular ice cream maker. We ate it right out of the ice cream maker.

Saturday, December 15, 2012

Chocolate Peanut Butter Bugles

Originally found on Pinterest... Here's the original post. We used essentially the same ingredients, just a different kind of chocolate and peanut butter.  We thought it was the perfect combo of sweet and salty.


Ingredients
  • 1 (7.5 oz) bag of Bugles
  • 2 bags of candy melting discs (we had leftovers from Halloween)
  • 1 cup creamy natural peanut butter
  • 1 cup powdered sugar
  • 2+ Tbsp of milk
Directions
  1. In a large bowl combine your peanut butter and powdered sugar. Add milk 1 Tbsp at a time until it's smooth. (I used 2 Tbsp)
  2. Beat until smooth.
  3. Using a piping bag or a ziplock with the edge snipped off pipe the peanut butter into the Bugle.
  4. Melt your chocolate in the microwave for 1 minute on 50% power, stir and repeat for 15 seconds until melted. Only melt about 1/4 of the chocolate at a time.  You will find that easier and won't have to rush through before the chocolate re-hardens.
  5. Swirl the peanut butter end of the Bugle into the melted chocolate and set on a wax paper lined baking sheet.
  6. When all are dipped put in freezer until set and ready to eat.
Notes
The original poster indicated she liked to eat these frozen, but we didn't try that. These are best if eaten the same day you make them.

We used three kinds of melting discs - brown and lime green milk chocolate and dark cocoa.  Gave some variety to the colors in the bowl.

These were a huge hit at the party we took them to.  We give them a 4 out of 5 stars, because honestly you have to be patient as it takes so much time to pipe the peanut butter in.  We did this together, so that helped.  By yourself, it would be too time consuming.  One piper, one swirler.  Enjoy.

Thursday, December 6, 2012

Lemon Sandwich Cookies

I took two lemon desserts with me to "Friends-Giving" a few weekends ago. I made these first, but I was afraid that they wouldn't serve enough people. Beware - it only makes like 12 cookies - you have to use 2 cookies for each sandwich, so it takes lot of cookies!  I was surprised how few it made, but they were worth every second in the kitchen.

Inspired by this pin, this recipe comes from itty bitty kitchen.

Lemon Sandwich Cookies:
  • 14 tablespoons unsalted butter, room temperature (this is important!)
  • 1/4 teaspoon salt
  • 1/2 cup confectioners sugar
  • 1 1/2 cups all-purpose flour
  • 1/2 cup cornstarch
  • 1 teaspoon vanilla extract
  • zest of one lemon
Filling:
  • 1 cup confectioners sugar
  • 1/4 cup unsalted butter, room temperature
  • juice of one lemon
  1. Preheat oven to 300 F.
  2. In a large bowl cream the butter, salt and sugar until light and fluffy on a medium setting, roughly 3 minutes. Reduce the speed to low and  incorporate the vanilla and lemon zest, scraping down the sides as you go. Sift the flower and cornstarch into the mixture and beat on a low setting until just combined.
  3. Take small portions of the mixture and roll into balls, continue until you have 25-30 (I made mine quite large, I ended up with roughly 23) pieces. If you want them to be as even as possible, roll out the mixture until it forms a log then use a clean knife to section into 30 pieces.
  4. Place them on a baking tray lined with wax paper, gently press on each piece with a fork until it has left an imprint. You can also press on them gently with your fingers, if you do not wish to leave an imprint.  (I used the criss-cross look like a peanut butter cookie because I thought they were cute.)
  5. Bake for 20 minutes. let them cool completely.
  6. For the filling beat the sugar, butter and lemon juice on a medium setting until incorporated. Keep adding sugar until you get a thicker consistency - you don't want the filling to squish out all over, but rather support the top cookie.
  7. Use the back of a spoon, or a knife to ice one side of the cookie then sandwich them together. Try to find two which are similar sizes.  The biscuits can be kept for up to 5 days in an air tight container.


All I can say is WOW - these were awesome.  A 5 out of 5.  Totally worth every minute.  I loved them and so did others.  I hope you do, too!


Wednesday, December 5, 2012

Chicken Parm Bake - My Way

Inspire by this pin... by the Food Wishes blogger  .  I didn't like having to watch the video to get all the directions.  But, I like the idea of a healthy, baked version of Chicken Parmesan.  I did downsize the recipe, so it wouldn't be so much food - we're only feeding two at our house most of the time.

Ingredients:

2 tbsp olive oil
2 cloves garlic, crushed
hot red pepper flakes, to taste 
3 boneless skinless chicken breasts 
1 can tomato sauce
oregano (a few tsps)
basil (a few tsps)
thyme leaves (one tsp, as DH is not a fan)
8 oz mozzarella, shredded
4 oz Parmesan, grated
1 (5-oz) package garlic croutons (Used Arnold brand)


Directions

  1. Prepare the 9x9 pan by pouring the olive oil into the bottom and then coat it with garlic and hot red pepper flakes.
  2. Put the chicken breasts on top.
  3. Pour can of tomato sauce on top. Season with basil, oregano, and thyme leaves.
  4. Add about 1/2 the cheese.
  5. Add the croutons.
  6. Put the other 1/2 of the cheese.
  7. Bake at 350 degrees for 30 minutes.

I'll be honest - I didn't really measure most of the ingredients, just added what I thought looked like enough to cover the chicken breasts.  So, the ingredient list is not exact.  Use what you like.   NOTE: My chicken finished after 30 minutes (plus resting for 10 - do not underestimate the resting period which will allow the chicken to cook more). Your cooking time may be up to an hour depending on the size, shape, and temperature of your chicken. Please use a meat thermometer to check doneness (155 degree F.)   We gave this dish a 4 out of 5.  We both enjoyed it.  Hope you do, too.

Sunday, November 18, 2012

Low-Fat Lemon Yogurt Cake - Healthy & Yummy

Loved this lemon cake.  It is dense like a pound cake, but very moist and subtle.  Can I just say it again - I loved it!!

Inspired by this pin, this recipe originally came from cravingchronicles.com


Low-Fat Lemon Yogurt Cake

Makes one 8 by 4 inch loaf cake

Ingredients

1 1/2 cups all-purpose flour
2 teaspoons baking powder
1/2 teaspoon salt
1 cup plain low-fat Greek yogurt (can use regular, too)
1 cup sugar
1 whole large egg, 3 large egg whites
2 teaspoons grated lemon zest (2 lemons)
1/2 teaspoon pure vanilla extract
1/3 to 1/2 cup vegetable oil


For the glaze:
1 cup confectioners’ sugar
Freshly squeezed lemon juice


Directions

  1. Preheat the oven to 350° F. Grease and flour a loaf pan. Line the bottom with parchment paper.
  2. Measure the flour (scoop and level), baking powder, and salt into a small bowl and whisk until combined. In a large bowl, mix together the yogurt, sugar, eggs, lemon zest, and vanilla. Add the dry ingredients into the wet ingredients and slowly whisk together. Fold the vegetable oil into the batter until it’s all incorporated. Pour the batter into the prepared pan and bake for about 50-60 minutes, or until a cake tester placed in the center of the loaf comes out clean.
  3. When the cake is done, allow it to cool in the pan for 10 minutes.
  4. For the glaze, combine the confectioners’ sugar and 2 tablespoons of lemon juice. If the glaze is still too thick, continue adding 1 tablespoon of lemon juice until it’s runny enough to pour.
  5. Carefully place on the cake a baking rack over a sheet pan or a sheet of parchment paper. While the cake is still warm (but not hot!), pour the glaze over, allowing it to drip down the sides.


Wednesday, November 14, 2012

Hawaiian Chicken in a Pot.


Inspired by this pin. This basic recipe was easier.

Hawaiian Chicken in a Pot


Ingredients

4 boneless, skinless chicken breasts
1 cup pineapple juice
1/2 cup packed brown sugar
1/3 cup light soy sauce


Directions

  1. Spray crockpot with oil.
  2.  Add everything to crockpot.
  3.  Cook for 4 hours on low.  Left on warm for another 3 and a half.   If you don't need it to go for 9.5 hours, you can cook it on low for 6 to 8 hours straight.


I was not a fan of the no vegetable or fruit included, so I would definitely add a can of chunk pineapple.  It would also be great with chopped peppers, but my DH is not a fan of peppers.

We gave this recipe a 4 out of 5 stars.

Tuesday, November 13, 2012

Halloween Decorations - One Last Post for 2011

Here's a breakdown of some of the items I used to decorate for Halloween this year.  I'll provide links to directions and fun information below each one.

Feel free to follow my Halloween Craft pins on Pinterest to see what I might make for next year.   You can see other decorations I made in other posts - monsters, banners, and more.


Containers with Harry Potter Labels
I found these Harry Potter labels - a free printable.  I took some old jars - the ones on the end are made from liquid coffee creamer containers.  The second from the left is made from dry coffee creamer and the other was an old salsa jar.  The first container was just painted, then the label glued on, and then a second coat added with some brush strokes over the edge of the labels. The second container of "slug repellent" was too fun - I took antiquing medium and painted over the jar. I let it dry, attached the label and then added a few rough strokes on top - like it had overflowed.  Looked disgusting, which is perfect for Halloween


Eyeball pumpkin - first attempt.
Pumpkins are such a great medium - your only limit is your imagination.  The blue-eyed side looked a bit odd - finally decided that the blue area was too big.  So I just turned it around and tried again.  You can see the difference in the green.  Much better..either end works!  See the photo at the end of this post to see what is looked like on our front porch.


Eyeball Pumpkin


Pantyhose Covered Pumpkin
I had a pair of lacy pantyhose that I got a runner in, so I held onto the good leg until Halloween, just to make this lacy pumpkin.  I balled the top of the hose up and tied it into a knot.  This made a topper for the pumpkin - looks pretty cute, I think.

A few bats on the mirror reflect the big sweeping bat decoration area.
Mask Covered Pumpkin
Two of My Pumpkins
Our China Cabinet with added Halloween pieces - a painted craft pumpkin with our initials, a witch's hat propped up on top, a sign hung casually on the door handle. And the white you see on the right side - that's the ghost that I strung across one of our windows.  So easy and a big impact.
Halloween Garland
I made this Halloween Garland to hang over the island separating our kitchen and dining room. I got the idea from Pinterest and found free downloadable templates.  I added black strings to the top.  The photo isn't great - because the opening is in the middle of our house, I had my DH hold a table cloth behind it to block the light and junk on the other side of the countertop. 

A few bats on the mirror reflect the big sweeping bat decoration area.

Bats swooping across our walls and ceiling
These bats are great. I got the idea from Pinterest and then tracked down a bat template.  Cut the bats out of black scrapbook paper and bent the wings slightly.  Arranging them in a swooping motion is what really made the decoration pop - I got more compliments on this than anything else.


Our milk jugs for outside.  Drew simple faces on these..you can see them in the front stoop photo below. I filled them with water and a glow stick...added a little fun to our stoop. They didn't glow as brightly as I had hoped.


Kids Craft Area at Our Halloween Party

Tulle Lights
Tulle Lights
 I set up a kids craft area at our party. We bought the butterfly shaped masks from Michael's.  We cut out 50 basic masks from colored foam. We provided Halloween themed foam stickers.  The kids loved it.  Gave them something to do and they got an personalized party favor. It also kept them from being underfoot every minute of the party.  I hung up purple lights, but thought they looked a little plain.  So I took strips of tulle fabric (about 7 to 10 inches each) and tied them next to each light.  After I got one on each side of every light, I just kept going - adding more and more.  I actually think they could use a bit more.  I bought four yards of black tulle and only got about halfway through it before the party.  But, I think it makes the lights more interesting and fun.
 
Our Front Window during the day
Inspired by this pin, I made these on a whim with black construction paper.  Just cut out a shape that appears like a monster.  Don't make the details too small -- it will get lost.  I used a white Styrofoam plate for the white eye and purple tissue paper for the two eyes.  We put a string of Christmas lights behind them.  Next year, I'd like to get orange lights.


Our Front Window at night

Our Front Stoop...see the pumpkins, milk jugs and the tombstone on the right.  You can also see the monster in the window.
Ghosts in the trees


My final outdoor decorations were ghosts in the trees.  I took small kitchen trash bags, cut off the end with the strings/handles, and stuffed them with newspaper.  I then took a twisty tie and added one to the top of each ghost - word to the wise, be sure to put it through the plastic and some of the newspaper or it will tear in the wind.


Hope you enjoyed these photos of our decorations.  I didn't capture every detail and I really want to do more outside items for next year.  I'll be watching Pinterest for ideas.

Respect the Bird


I don't normally do posts that don't center on a craft or a recipe or some kind of DIY project. But, I have to say something about Halloween, Thanksgiving and Christmas.

Halloween, Thanksgiving, and Christmas are three different holidays - it should not be a sprint from start to end.

I loved Halloween, so fun and so many great crafts to do.  I love seeing the kids come to the door, talking with my nieces and nephews about their costumes, and finding fun recipes to try during that time.

I am looking forward to Thanksgiving for a totally different reason. I really want to embrace the day and be grateful. I'm even particpating in Twitter's #thankful30 movement.  I want to slow down, think about my life, and relax.

And the day after Thanksgiving, I am all in Christmas - Black Friday shopping is awesome.  I love the lights, the crafts, the music, the movies, the gifts, etc... But, not at the expense of Thanksgiving.

For those of us who have Thanksgiving off, we should be grateful for that and return the favor to those who are being forced to work.  Thanksgiving is a day for family, not stores.  It's a day to be grateful and the world might be a better place if everyone just stayed out of the stores.

So, I am urging you - don't do it.  No matter what the stores promise you.  Don't give them your business after midnight.  Respect the bird.


Monday, November 12, 2012

Monster Craft..New Orleans Inspired & Elvis Inspired

I actually made three monsters this year for Halloween.  These two were my favorites.  I hope you enjoy them.  Here you can see an overview of our Halloween decorations and fun food.


All you need are milk jugs -- which you can paint any color...you can see I painted this one red.  No special paint - but each needed at least two coats.  Some others needed three coats.

You can make eyes out of many items - this sparkle paper was fun and it made it fun.  I also gathered jewelry and beads to use.  It really can be made of almost everything.  

You can cut a variety of mouth shapes...I left the handles on them to make them easier to move around.
My "Elvis" Inspired Monster..A little attitude with the hair.  Note the "backwoods hick home" below - my husband made the house for our wedding, but thought the furniture outside made it funny for Halloween.
New Orleans Inspired Monster


Tuesday, November 6, 2012

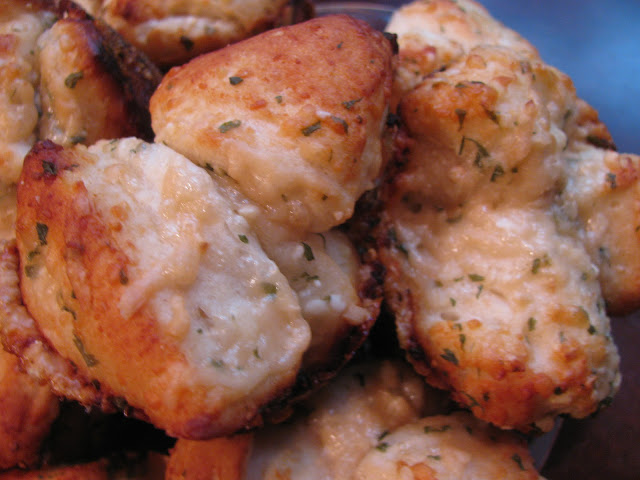
Garlic Monkey Cups

The original recipe came from Real Mom Kitchen blog.  I made a few adjustments without really realizing it.

The biscuits - I got Reduced Fat Buttermilk Biscuits - they were so huge. I cut each biscuits into 6 pieces and only fit 4 or so in each muffin slot.  And we baked for 12 minutes and I thought it was overdone, so here's my version of her recipe.

Garlic Monkey Cups

 Ingredients
  • 2 (7.5 oz) cans reduced fat buttermilk biscuits
  • 9 Tbsp butter, melted
  • 5 cloves garlic, minced
  • 4 Tbsp dried parsley flakes
  • 1/2 cup fresh grated Parmesan cheese plus 2 Tbsp. additional to sprinkle on top if desired

Directions

  1. Cut biscuits into 6 pieces and place in a bowl. I like to use kitchen shears to cut up the biscuits.
  2. Combine the melted butter, garlic, parsley, and 1/2 cup Parmesan cheese together and pour over the biscuit pieces.
  3. Gently toss the biscuit pieces to get evenly coated with the butter mixture.
  4. Using a 12 cup muffin tin, place 6-7 pieces of the coated biscuit dough into each muffin cup. Use the additional 2 Tbsp of Parmesan cheese to sprinkle on top of the breads in the muffin cups.
  5. Bake at 400 degrees for 10-12 minutes until golden brown. Serve warm. Makes 18 garlic monkey cups.
 I got a lot of compliments on them.  We give them a 5 out of 5.

Wednesday, October 31, 2012

Eyeball and Monster Foods - Focus on Halloween Party Menu

Details of our Halloween Party food -- I wanted to focus on a certain type of food. So, I started looking for eyeball and monster foods.  After some time, I went with what I had time to get done and was within my realm of abilities.

Here's our complete menu. I linked to the original recipe and if I made significant changes, I am going to post those below.  

Hopefully, you'll find something you'll want to use. 


Our Menu

Entrees

Tombstone Sandwiches, original recipe, see below for more info
Tortured Squash Soup, a remake of my butternut squash and apple soup
Ghost and Eyeball Pizzas, see below

Appetizers/Side Dishes

Witch Vomit, original Pinterest item
Punkin Chunk 
Hummus Veggie Tray

Desserts

Ogre Eye Cookies, original recipe
Witch's Hats, original recipe, see below for more info
Jello Worms, original recipe, see below for more info
Ghost S'Mores Brownies, original recipe, see below for more info
Monster Eye Cupcakes, original recipe, see below for more info
Monster Munch, see below

Drinks

Blood Punch


Tombstone Sandwiches

Ingredients

Hoagie Rolls (cut in half)
2 cans, Canned Chicken
2 tbsp, Miracle Whip
2 tsp Brown mustard
1 small Cucumber, peeled and well- chopped
3 tsp, Tarragon

Directions

1. Combine all ingredients in a bowl.
2. Spoon into hoagie rolls.

Notes for Future: I just leaned them up against each other on a platter.  The effect would be stronger if they had been in a bed of shredded lettuce.


Ghost Pizza and Eyeball Pizza

(I only a picture of the post-cut ghost pizza -original crust recipe is from Cottage Living magazine, so old that my paper copy is wrinkled and dirty.)

Pizza Crust

Ingredients

2 cups bread flour
2 cups wheat flour
1 (1/4 ounce) envelope active dry yeast
1 tbsp salt
2 tbsp olive oil

Directions

  1. Dissolve yeast in 1/2 cup warm water (100 to 110 degree). Let stand 10 minutes (mixture should be creamy and bubbly.) Combine yeast mixture with 1 cup warm water and remaining ingredients in a large bowl of a stand mixer fitted with a dough hook. Mix at medium 5 minutes or until smooth and elastic. (Dough will be slightly wet.) Place in a large, lightly greased bowl. Cover with lightly greased plastic wrap, and let rise 2 to 3 hours in a draft-free environment. (Dough will double/triple in volume.)
  2. Push dough down gently, turn into a floured surface, and divide into 3 portions (for three large pizza, can also do 6 small pizzas). Form into round balls, cover with lighly greased plastic wrap, and let stand 20 minutes.
  3. Stretch dough gently into the Halloween shapes - make one look like a ghost and the other into an ellipse for the eye - directly on baking stones (I always use Pampered Chef) sprinkled with flour.  Top as desired to look like an eye or ghost.
  4. Bake in preheated 450 degree oven for 10 to 15 minutes.

Toppings

Mozzarella, pre-shredded cheese
Pepperonis - for mouth
Black Olives - for black part of eyes

Witch's HatS

Ingredients

Fudge Stripe Cookies
Hershey Kisses
Chocolate for melting (I bought Wilton's melting chocolate) 

Directions

Fudge Stripe cookies flip over, melt chocolate (I picked up neon green), and make a circle around the middle hole. Then push a Hershey's Kiss into the center.

Easy peasy. 


Thinking of doing at Christmas and using white and red for Santa Hats 


Worms

So disgusting, but so worth it in terms of appearance.


Ingredients

100 flexible plastic straws (The straws with a bendable neck make the most realistic worms by adding ridges to the worm.)

Empty, clean 1-quart milk or orange juice carton to hold straws (The straws will fill up to the height of the container, the taller the better.)

1 package (6 ounces) raspberry or grape flavor gelatin
3 envelopes unflavored gelatin
3 cups boiling water
3/4 cup whipping cream
12 to 15 drops green food coloring

waxed paper

Directions

  1. Combine both kinds of gelatins in a bowl and add boiling water. Stir until gelatins completely dissolve. Chill until lukewarm, about 20 min.
  2. Meanwhile, gently pull straws to extend to full length; place in tall container with bendable necks at the bottom.
  3. Blend cream and food coloring with the lukewarm gelatin mixture. Carefully pour into the straws. If the coloring is off, just get the red food coloring out and try to adjust the coloring.  I think mine had a bit too much green.
  4. Chill until gelatin is firm, at least 8 hours, or cover and chill up to 2 days.
  5. Pull straws from container or, if you’re using a carton, simply tear the carton away from the filled straws. Pull straws apart. Run hot tap water for about 2 seconds over 3 to 4 straws at a time. Starting at the empty ends, push worms from straws with your fingers.
  6. Lay worms on waxed paper-lined baking sheets. Cover and chill until ready to use, at least 1 hour or up to 2 days. Worms will hold at room temperature for about 2 hours.  I filled a bowl up of the worms and placed that bowl in a bowl of ice - the worms lasted hours.

Ghost S'More Brownies

Graham Cracker Crust
1 stick of unsalted butter, melted 
1 1/2 cups crushed graham cracker crumbs 
2 tablespoons sugar 
Pinch of salt

Directions

  1. Press the crumb mixture evenly over the bottom of a well-buttered 8 x 8 pan~ the scarily perfect size for 3 rows of 4 marshmallow ghosts.
  2. Bake crust 10 minutes at 350 degrees.

Top of S'more Ingredients

Brownie Mix, plus ingredients for brownies
Peeps - 12 Ghosts
Chocolate Chips
Mini Chocolate Chips (@12) 
 
Directions
  1. Pour your brownie batter on top of the graham cracker crust and bake according to recipe/mix directions.
  2. Added a layer of chocolate chips during the 5 minutes of baking time for more chocolatey-s’more-goodness and to help the marshmallow spooks stick to the brownies.
  3. Place your PEEPS® Ghosts on top your chocolate chip/brownie layer and broil very briefly!  If you do and burn them to death like I did, rescue them, scrape off the black part and put on new ghosts and make another attempt.


Monster Cupcakes

Ingredients

Devil's Food Cupcake Mix & Ingredients
Icing
Purple sprinkles
Marshmallows
Chocolate Chips

Directions

  1.  Make the cupcakes according to the box directions.
  2. Frost the cupcakes.
  3. Sprinkle icing with purple sprinkles.
  4. Place a large marshmallow on sideways.  Use a bit of icing to stick a chocolate chip in the center.
Notes for future:  Pre-pour all the sprinkles into a bowl. Dip the frosted cupcakes into the sprinkle - you would get fuller and better coverage.  Also, either make mini cupcakes so the large marshmallows look bigger or try two large marshmallows - would increase the "wow" factor.


Monster Munch

Basically a Halloween trail mix...

Ghost Poop - mini marshmallows
Witch's Nails - candy corn
Scarecrow Stuffing - rice chex
Worms - sour worms
Bat Poop -chocolate covered raisins
Kidney Stones - dried cranberries
Pumpkin Hearts - dried mango

Throw it in a bowl, make a cute sign and you are ready to roll!